BLOG
IoT Hardware Development How To’s for Software Engineers

While much of the IT world silos off the ‘hardware people’ from the ‘software people,’ these distinctions begin to break down when it comes to embedded devices and IoT.
Creating a capable, user-friendly, and cost-efficient IoT device requires an understanding of both sides of the coin, yet too often we believe that we can abstract away the hardware and approach development from a purely software standpoint.
As a result, only about 20% of IoT product mangers have hardware experience, compared to the 76% who are familiar with managing software development projects.

That’s why we invited Todd Resudek, Senior Software Engineer at SimpleBet, to give a hardware primer for software engineers at our Nerves in Action web series.
So, whether you’ve got a Raspberry Pi sitting in front of you and you’re not sure where to start, or you’re a veteran software engineer who wants to expand your hardware horizons, we’re going to go through all the basics.

Electronics Fundamentals
Before we get into the hardware, we need to understand the physics that govern electronics. At the core, we have circuits, closed loops that electrons can travel in.
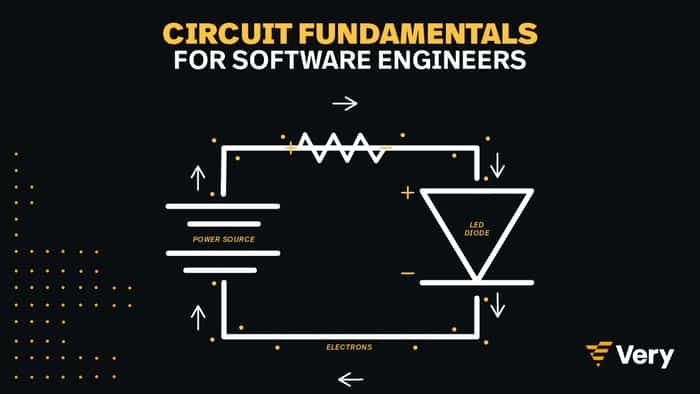
These take two main forms in our hardware development. First, every component we use will attach via a circuit, and we’ll keep track of them with circuit diagrams. Second, the microprocessors at the heart of our project contain chips loaded with tiny integrated circuits that provide all our compute backbone.
Next, we need to consider the variables that govern the flow of electricity in our circuits:
- A volt (V) is a unit of electric potential
- An ohm (Ω) is a unit of electrical resistance (R)
- An amp (A) is a unit of electrical current (I)
For an easy analogy, Todd compares them to plumbing pipes, explaining that “the voltage is the equivalent to the water pressure, the current is equivalent to the flow rate, and the resistance is like the size of the pipe.”
Crucially, the relationship between these variables is defined by Ohm’s Law: I=V/R. We’ll use this formula later to select components, such as resistors, to build circuits with the right amount of current.
The last piece of the puzzle is the watt (W), which is a unit of power. Defined as one joule per second, wattage tells us the rate of energy transfer. Everyone should be familiar with this metric from the kilowatt hours on their electric bill.
By using a multimeter, we can measure voltage, current, and resistance in our circuits. So, now that we’ve laid the groundwork, let’s begin building our project!
Basic Components
Let’s start with diodes. These semiconductors prevent current from reversing direction, essentially making our circuit a one-way road.
“The idea is that if you don’t want the current to flow backwards and destroy a component that’s in a circuit there, you put a diode in place,” explains Resudek.
Next, we have resistors, which, as the name implies, adds resistance into our circuits to reduce current, adjust signal levels, divide voltages, or terminate transmission lines.
For instance, if we need to reduce current (I) in one part of our circuit, we can apply Ohm’s Law (I=V/R) to add the right amount of resistance
The capacitor is another basic component. These passive energy stores hold energy in an electric field to ensure a consistent flow of energy.
“It’s like a battery,” says Todd, “but it stores a lot less energy and lets it go a lot faster… anytime you want a very consistent, very clean amount of energy flowing through your circuit, you put a capacitor in place.”
The Good Stuff
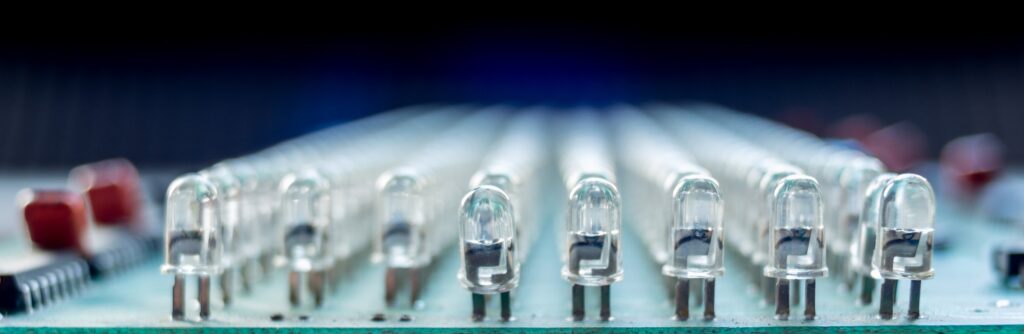
With our basic components out of the way, let’s move on to some of the good stuff. One of the easiest ways to start experimenting with hardware is LEDs, or light-emitting diodes. They function just like diodes, making sure electricity only flows in one direction, but the main difference is they convert that electricity into light.
Since different color LEDs function at different voltages, this makes them ideal for learning how to manipulate Ohm’s Law with resistors or voltage step-ups.
If you want to chain a whole string of LEDs together, we can use NeoPixels, which integrate red, green, and blue LEDs with a driver chip. This lets us operate up to 1024 LEDs from a single data pin.
Another cool component is the potentiometer, or adjustable voltage divider. Essentially, this is a variable resistance that we can turn to adjust the brightness of lights, raise or lower speaker volume, or adjust a motor’s speed. The knobs on an electric guitar are a familiar example.
Sensors
Every IoT device needs to be able to pick up data from its environment to do its job. These hardware components come together to form a data acquisition module; they include sensors for temperature, motion, light, etc., as well as the hardware that converts those signals into digital information for the computer.

Todd highlights a few sensors that are popular for IoT devices. First, we have the DHT22, a temperature and humidity sensor that’s perfect for applications such as building a weather station. Along similar lines, PM2.5 sensors measure particulate matter in the air to provide air quality information.
Another one of our favorites is ultrasonic distance sensors. Relying on an analogous concept to a bat’s echolocation, these devices send out ultrasonic waves to measure distances on average between 2cm and 450cm. This gives us information about our device’s level, position, and distance from other objects.
There’s also a handful of sensors for slightly wetter applications. For example, flow sensors measure the amount of liquid that’s passing through them.
Todd hints at a use-case, explaining that “if you wanted to make an internet-connected smart beer bong, for instance, maybe you could pick up one of these.” On a more serious note, he also suggests water solenoid valves that you could use to automatically water your garden.
Communication Protocols
The last piece we need for IoT hardware development is a way to tell our hardware what to do. Communication protocols link together the software and hardware components, and so understanding how they work is crucial to getting our IoT project off the ground. There are three notable examples.
GPIO
The first is GPIO, or general-purpose input-output. These are “uncommitted digital signal pins on an integrated circuit or electronic circuit board whose behavior, including whether it acts as an input or output, is controllable by the user at runtime,” says Todd.
The Raspberry Pi, for instance, comes shipped with a bunch of 3.3V GPIO pins. For a guide to GPIO on the Pi, checkout pinout.xyz. Moreover, we can control or read from GPIO on Nerves via Circuits.GPIO.
SPI
The second is SPI, the serial peripheral interface for synchronous serial communication. Used for short distance duplex connections, this highspeed protocol is often found in embedded systems. Just like with GPIO, we can control and read SPI signals in Nerves via Circuits.SPI.
I2C
Lastly, the I2C protocol is “a multi-leader, multi-follower, packet switch, single-ended serial communication bus,” explains Todd. This makes it ideal for embedded systems with multiple integrated circuits that need to communicate with each other. Again, Circuits.I2C lets us manage them on Nerves.
Conclusion
Developing a greater understanding of IoT hardware and the laws of physics that govern it is a smart move for the savvy software engineer. By expanding your horizons, you’ll increase the scope of what you can imagine, you’ll become more efficient at debugging your systems, and you’ll gain a holistic perspective on what goes into making IoT a reality.
The next step is buying some parts or even an IoT starter kit and doing some tinkering. Then, once you’ve designed your system, you may want to document it, send the idea to somebody, or even put it on GitHub. Todd recommends Fritzing, an “open-source hardware initiative that makes electronics accessible as creative material for anyone.”
There’s a lot that goes into seamlessly integrating hardware and software into a functional IoT device. That’s why Very adopted Nerves for IoT.
The Nerves Platform is a framework for developing embedded software with Elixir that gives developers easy access to their hardware.
On top of that, the NervesHub simplifies what used to be a nearly impossible process-updating firmware on IoT devices-by issuing over-the-air (OTA) firmware updates to devices in the field.
That’s how the Very team combines hardware development expertise and software know-how to deliver innovative IoT solutions. Want to learn more? Check out our IoT development services today.