BLOG
How to Build a Frictionless IoT User Onboarding Experience

First impressions matter, especially when onboarding a new user to an IoT device. Technology designed to improve a user’s life can quickly become confusing and frustrating if it’s unclear how to get started — which can impact user adoption and the overall effectiveness of the solution.
At Very, each member of our product team is involved in architecting a superior onboarding experience, with the goal of creating the least amount of steps for the user while delivering maximum impact.
In broad terms, to complete the user onboarding flow for an IoT device, a user needs to be able to:
- Say hi to the device
- Prove the device is theirs
- Give the device information and feel taken care of
In this blog, we’ll go over each of these steps, why the step is important to the product experience, and how to achieve it, along with some examples of how we followed this process on a recent smart home project for one of our clients.
Step 1: Establish Communication with the IoT Device
The first step your users will need to take with your IoT device is to configure and communicate with it. In the example below, the user begins by plugging in the device and downloading an IoT app on their phone. Once registration is complete, the user is welcomed with a call to action to add their device.
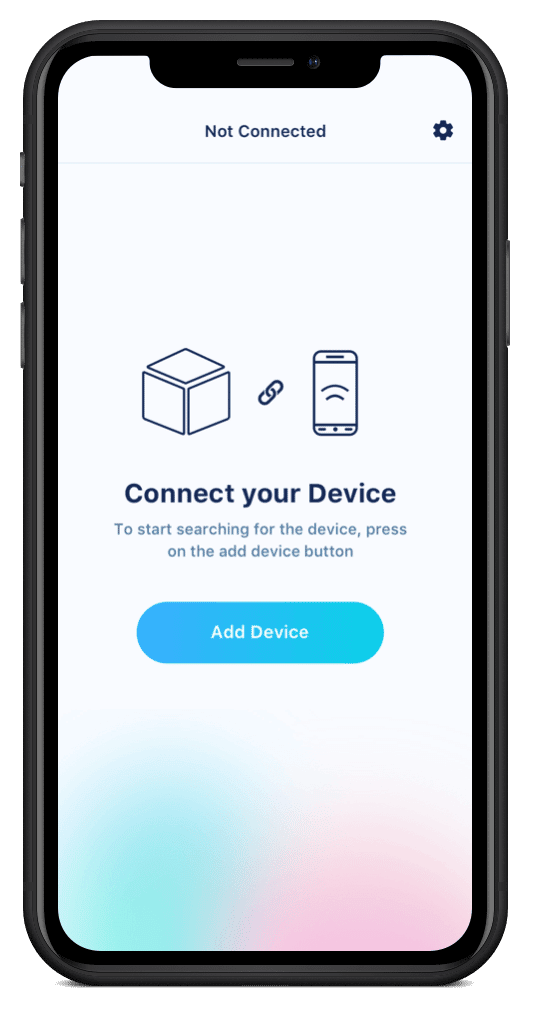
Upon selecting the CTA, the user is asked to allow location access, which enables the app to begin searching for the device nearby.
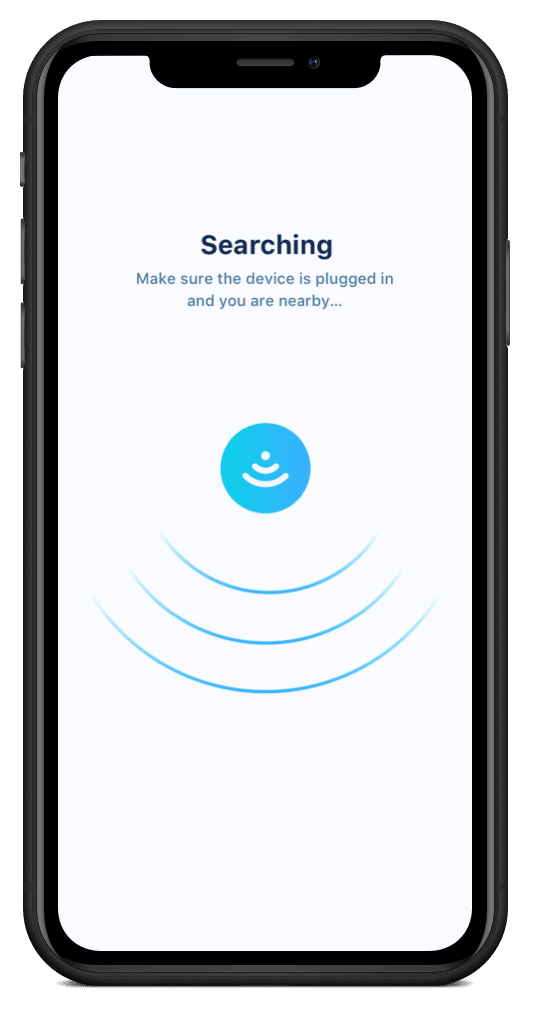
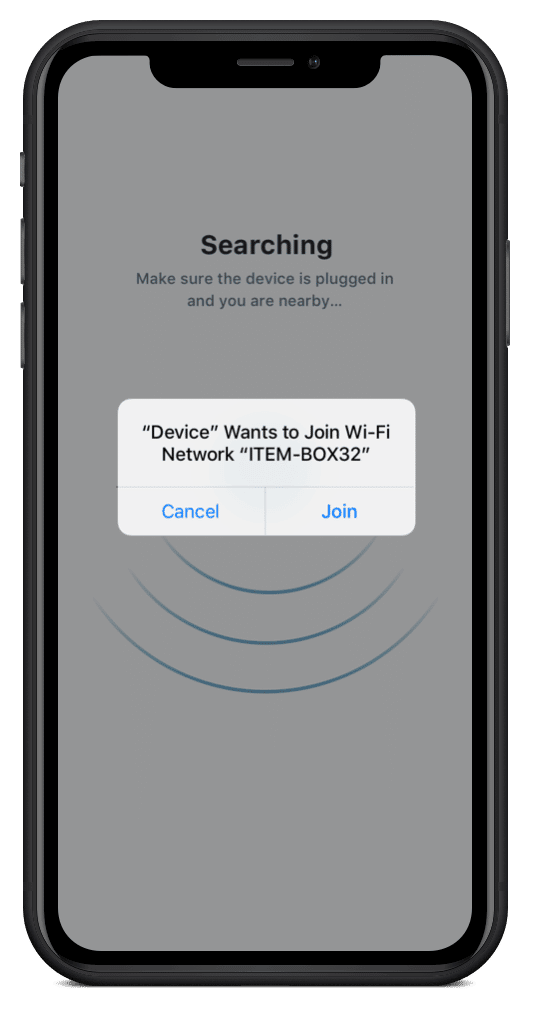
The device, meanwhile, advertises itself as a hotspot so that the user can instantly find and connect to the device through the app. This is a small but impactful part of the process, as many IoT apps instead provide the user with a complex code that they’d have to manually search for on their network. Doing the work on the backend to make the device pop up automatically saves the user time in an environment where seconds can be the difference between adoption and abandonment.
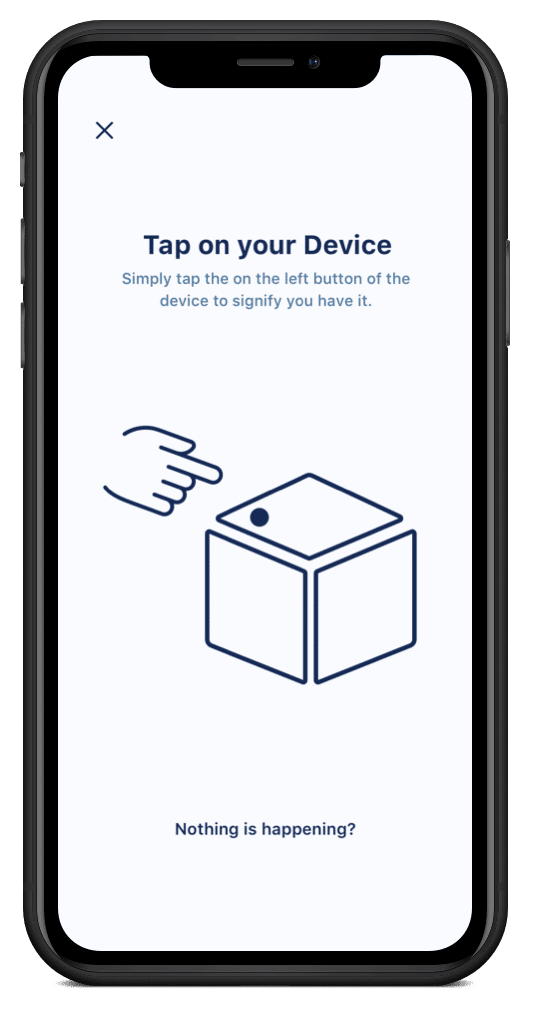
Step 2: Create a Physical Challenge for IoT Security
Once the user’s phone finds the device, the user needs to be able to prove that they have physical access to the product. This step provides a layer of security, protecting the device from being accessed and controlled by other parties in the vicinity. In the event that the user has purchased multiple identical devices, they’ll also need some sort of visual cue to understand which one they’re interacting with from moment to moment.
To help the user accomplish these things, you can create a physical challenge for them to “win” access to the device(s). In this case, the device in use lights up (helping the user differentiate between multiple devices), and the user can tap it to send a message that they have it in their possession.
Step 3: Give the Device Information
Finally, it’s time for the user to give the device critical information that will help it function as intended: the WiFi network name and password.
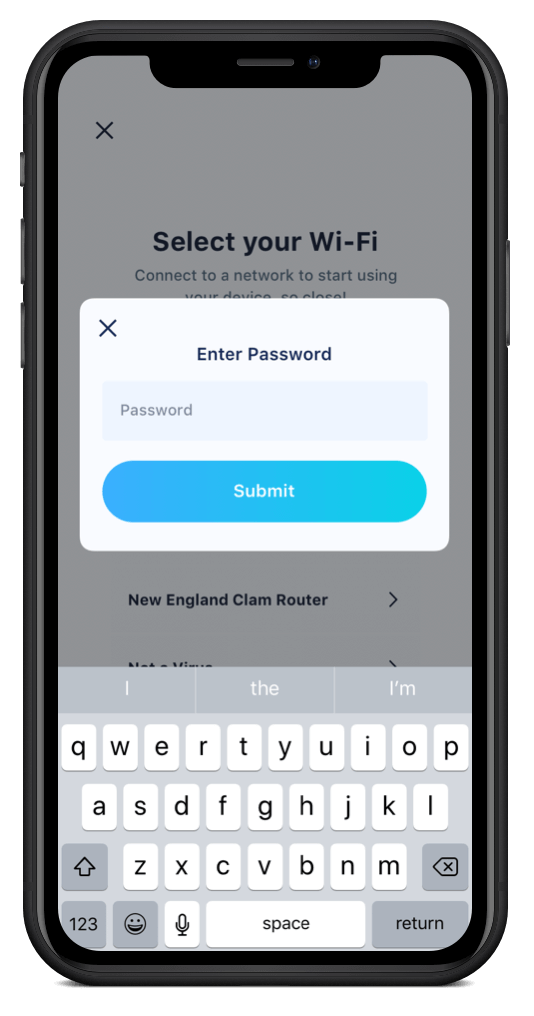
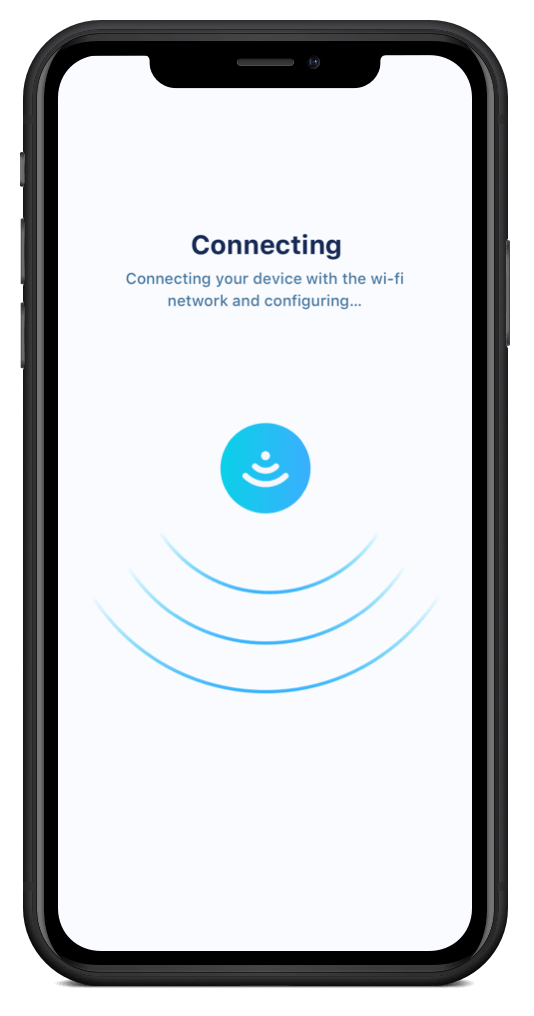
Once the user has submitted this information, the UI in the IoT app should signal to users that it’s taking action — especially when dealing with WiFi connections, which can vary in speed and quality depending on where the user is located.
If the user has a lagging connection but doesn’t have any sign from the app or device that it’s trying to connect, they might take steps that disrupt the process, like unplugging the device or rebooting the app, leading to a negative product experience.
We chose a simple animation for this onboarding task, but you might use something like a progress bar depending on what you’re trying to get across.
Building Happy Paths and Sad Paths
It’s also important to realize that connecting to WiFi doesn’t always mean successfully connecting to the internet. If you’ve connected to your WiFi, for example, and a thunderstorm knocks out a nearby telephone pole, you’re still connected to your WiFi, but you might not have access to the internet.
Whether the device successfully connects to the internet or not, you’ll need to think about how it should react to either outcome and create both “happy paths” and “sad paths” for the user to help them understand what’s going on. Happy paths and sad paths are relevant throughout the onboarding process and beyond to ensure clarity throughout the user journey.
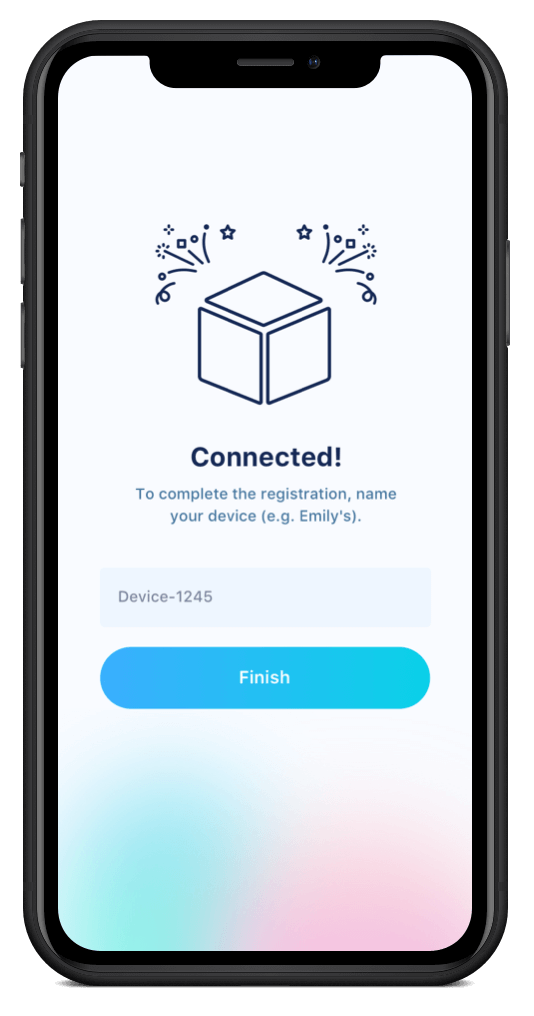
Happy paths occur when everything happens as it’s supposed to within the application — for example, the user correctly enters the WiFi credentials and the internet connection is working, so the device successfully connects and the user can move on to the next step.
Sad paths, meanwhile, account for all the ways that the process could break down — like if the credentials entered are incorrect or the internet connection is unstable. The user needs clear instructions on what went wrong and how they can fix the problem.
Creating successful happy and sad paths involves coordination between the front-end design and the architecture of the backend. In some situations, after successfully connecting to the WiFi, a device’s firmware might disconnect from the phone and go back to advertising its hotspot. The phone then looks for the device again, and once they recognize each other, the device can tell the phone that the WiFi credentials worked, and the UI of the app on the phone can communicate this to the user.
If the connection doesn’t appear to be working, the user can now know that it’s a problem with the internet connection, rather than incorrect WiFi credentials or an issue with the device. The UI on the phone can display a message offering more context and help users resolve the problem.
Guiding Users Through Better IoT Onboarding Experiences
Users want and deserve frictionless experiences with their IoT products, and crafting these experiences involves a lot of tiny, interdisciplinary decisions along the way that make a huge difference. User onboarding is critical, but it’s just the beginning.
To learn more about how we take high-impact IoT solutions from concept to production, check out our experience here.